


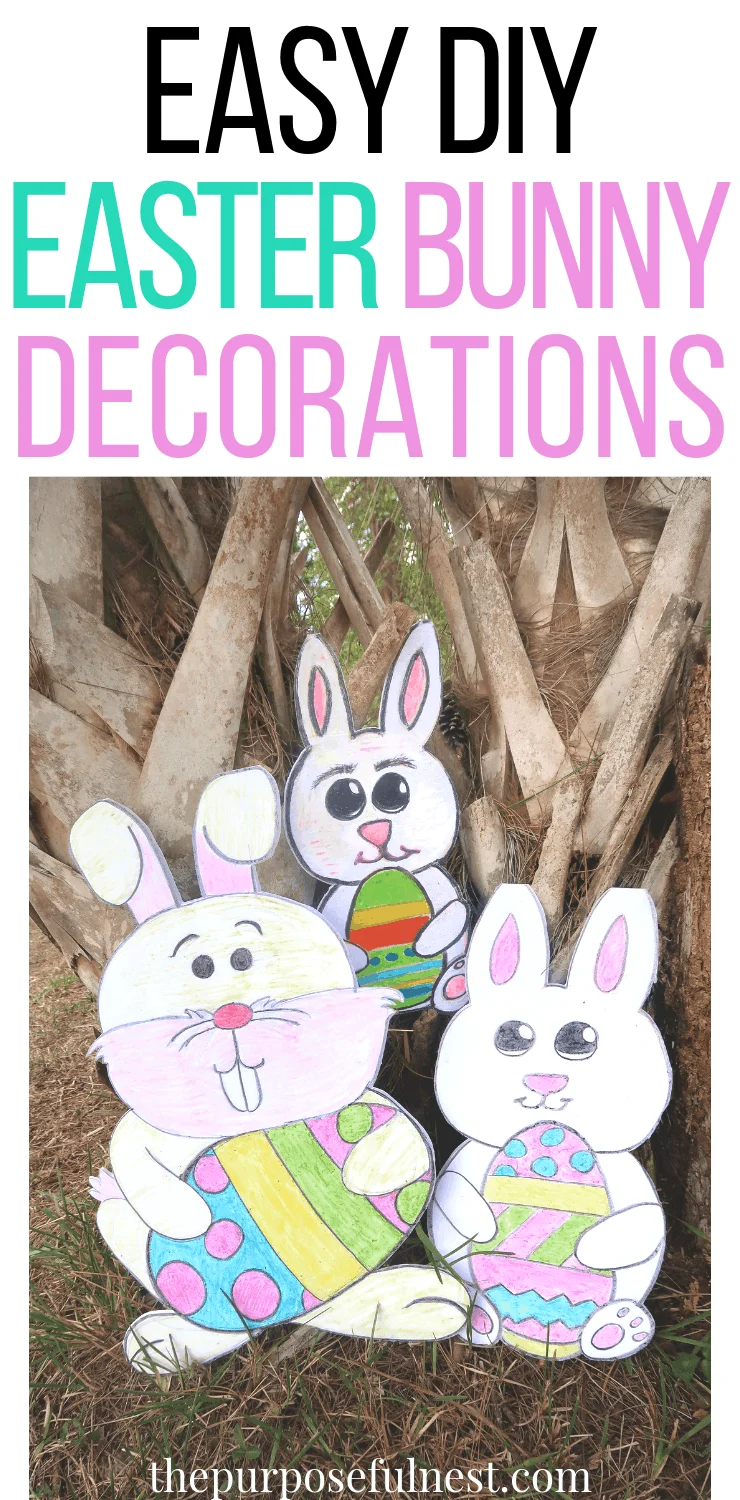
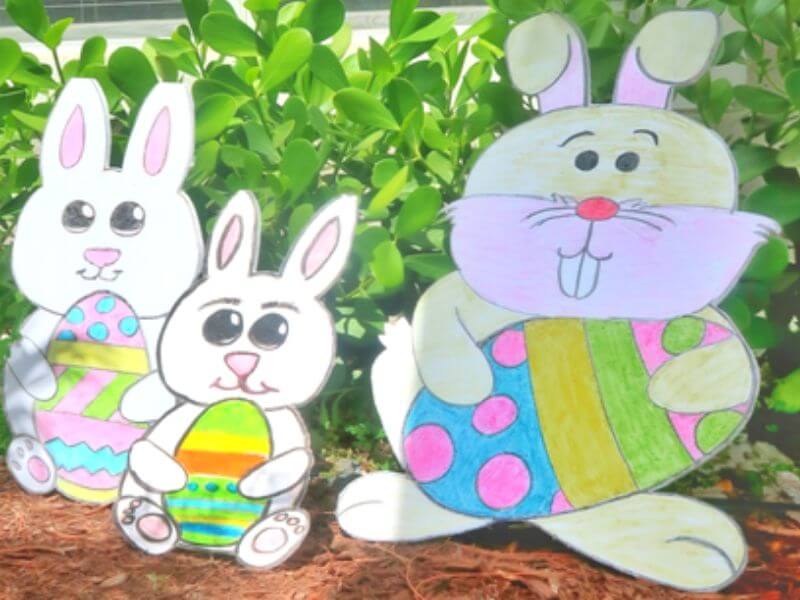
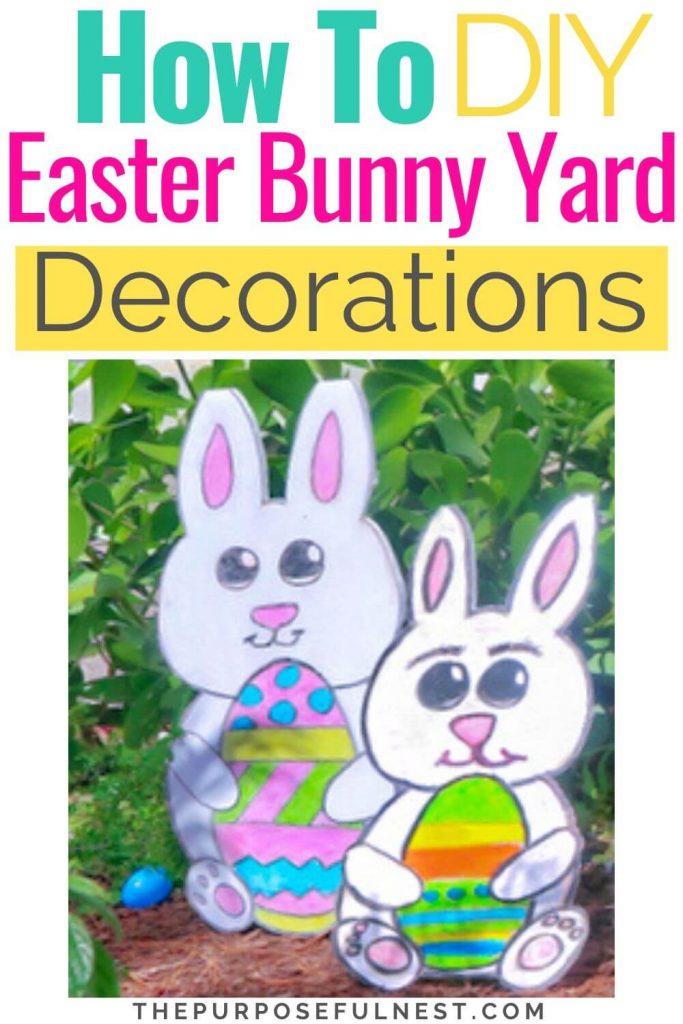
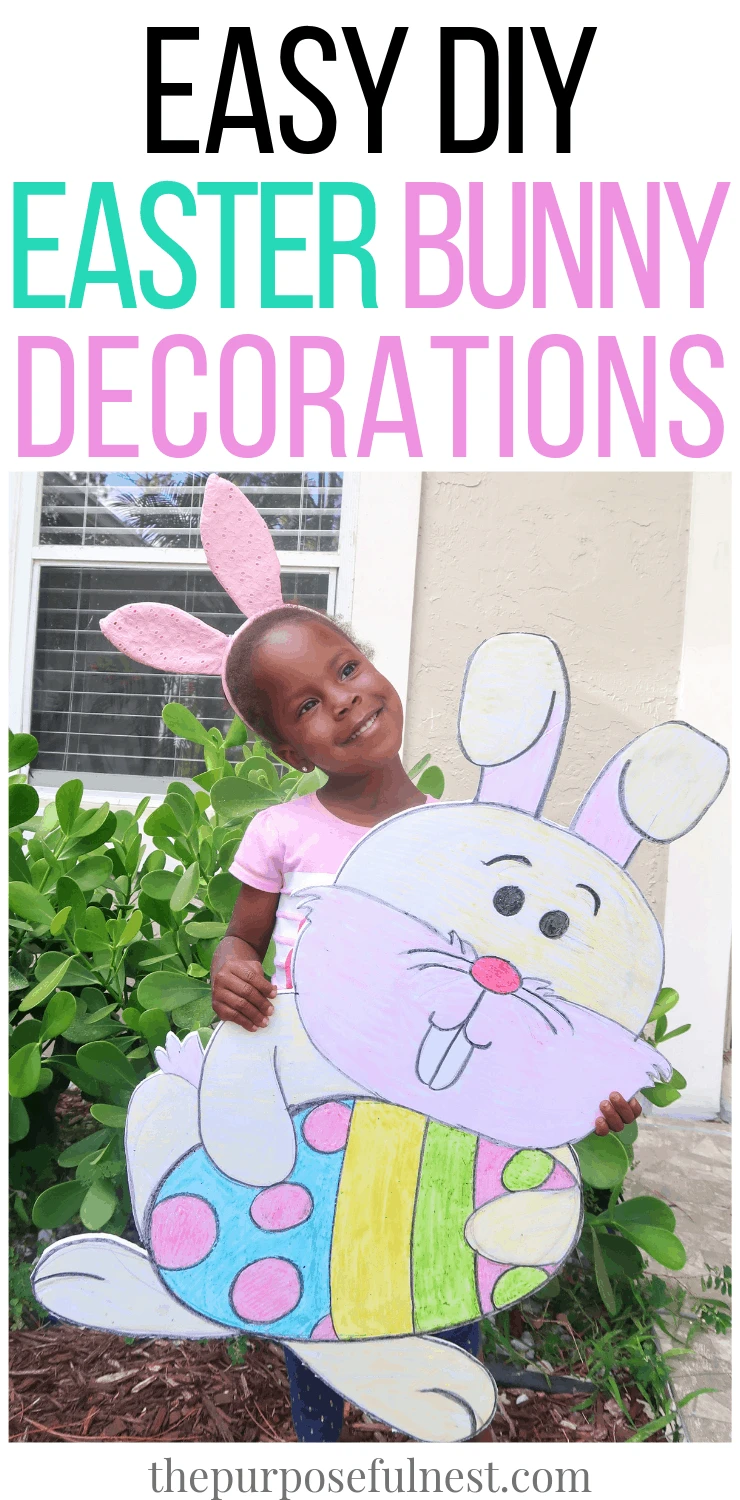
With Easter just around the corner, I am sharing how to make cute DIY Easter decorations. Easter is one of my favorite Holidays. Each Easter, we gather with other believers after worship for a meal and egg hunt. The kids enjoy playing with friends, hunting eggs, and eating candy. Last year, I made Easter bunnies out of foam board and used them as festive decor.

DIY Easter Decorations
As you make plans for the coming holiday, consider trying this fun craft. This is an expensive craft that is both fun and easy to complete. Once completed, place the bunnies outside as yard decorations or use them as fun photo props. I hope you use this craft tutorial to add adorable yard props to your Easter egg hunt this year for little money and minimum effort.
This post contains affiliate links. This means that if you purchase something from a link, I may receive a small commission at no charge to you! You can read more about affiliate links in my disclosure here. Thank you for your support in this way.
What You Will Need
- X-Acto knife
- Coloring medium of your choice. (Crayons, paint, or oil pastels)
- Readi-Board White Foam Boards ($1 at Dollar Tree)
- X-Acto knife

How It’s Done
The first thing you will do is draw whatever you want your sign to be on the large white foam board. In this case, I drew bunnies, however, you could just as easily draw an Easter egg or basket. No need to be alarmed if you do not know how to draw. You can google search how to draw whatever you’re looking to make and you will likely find a simple drawing tutorial. I followed the video tutorial below to draw an Easter basket. I also followed this tutorial to make a cute Easter bunny holding an Easter egg.

In order to make drawing the large image on the foam board easier, I suggest you first draw your picture on a regular-sized sheet of paper for practice. Once you’ve drawn your photo onto a sheet of paper you will then draw the same image onto the foam board, however, you’d draw the image much larger. You should also use light pencil strokes when drawing so you can easily erase any mistakes.
How to draw an Easter Bunny :
Next, after you have your picture drawn on the foam board, you should add color to the picture. Oil pastels, crayons, and paint are all good options for coloring your foam board. Once the image is colored, you will use your X-Acto knife to cut the picture out. Attach the sign to a wooden dowel with hot glue or tape so that you can stand them in your yard. If you wish to only use them as photo props you can skip attaching them to a wooden dowel.

I’d love to know if you try this project. Leave me a comment below or tag me @thepurposefulnest on Instagram.
If you enjoyed this post check out more fun DIY projects HERE.


Leave a comment